Mar.16.2024
Part I: Model Making with Image Model: From Concept to Creation
CAD Modeling, CAM Programming and Fabrication, and Raw Model Assembly
We have received many queries throughout the years about the intricacies of our model-making process. Therefore, we want to offer you an exclusive look at the behind-the-scenes details. Using our amusement park model that we meticulously designed and crafted as a guiding example, we will showcase the transformative journey from concept to creation.
Once all files and quote discussions are finalized and we receive the green light to start a project, our model-making process begins and can be generalized into a six step journey. From CAD modeling to CAM programming and fabrication, followed by raw model assembly, surface treatment and color/finish application, and ending with final assembly and packaging, we pay attention to every detail. In Part I, we will provide in-depth insights into Steps 1 through 3.
Step 1: CAD Modeling
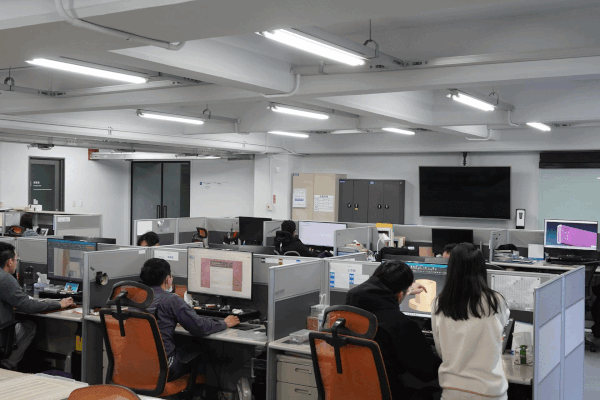
Our CAD team will carefully analyze and review the project's CAD and CMF data, and discuss the structural feasibility and necessary steps to achieve the desired CMF effects. After these discussions, our CAD team will modify the provided CAD to ensure it is suitable for model- making by incorporating the necessary functions/mechanisms and adjusting the dimensions to accommodate the tolerances of various processes.
Implementation: During our comprehensive analysis and review, our CAD team found that the off-the-shelf joystick was incompatible with the Teacups. After further discussion and planning, our solution was to dismantle and redesign the joystick casing and integrate the components into a specially designed casing.
Step 2: CAM Programming and Fabrication
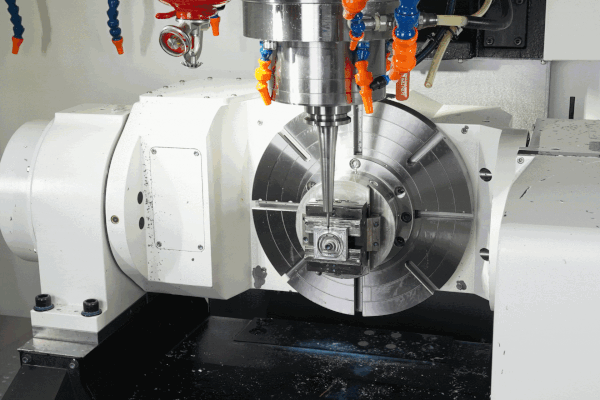
To ensure that our models are of the highest quality, we employ a wide range of methods and techniques. Our primary method is high-precision CNC machining, which is complemented by other techniques such as stamping, casting/molding, EDM, 3D printing, and more. When it comes to complexly shaped parts, we utilize 5-axis CNC machining technology to achieve fine surface quality and meet precise dimensional specifications in a shorter amount of time. We carefully select the methods and techniques that best suit the specific requirements of each model-making project.
Implementation: We chose to use 3D printing with nylon for the delicate design of the sheep on the Merry-Go-Round to ensure both strength and material requirements are met. Additionally, the protruding features on the Steam Train's head required careful machining in their surrounding areas to prevent any deformation during post-treatment, as they cannot be sanded.
Step 3: Raw Model Assembly
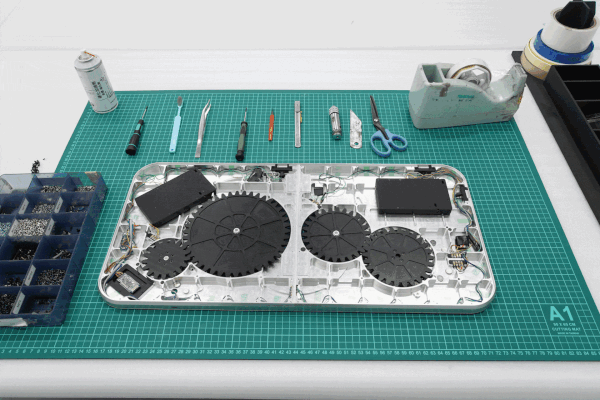
Once all the components have been fabricated and produced, the next crucial step is to assemble the raw parts for fit checks and functional tests. This phase focuses on examining the overall structural integrity, ensuring smooth functionality, and confirming that the assembly gaps are maintained for surface treatments and final color/finish application. The importance of this stage cannot be overstated, as it allows our team to quickly identify and resolve any issues, ensuring both the quality and timely delivery of the model.
Implementation: Once the raw parts were finished and after our assembly team diligently put them together, during the thorough testing phase to ensure optimal performance, we discovered some LED hot spot issues on the rotating base that supports the Teacups. To resolve this, we implemented a diffuser and made necessary adjustments to the illumination.
Stay tuned for Part II, which will explain the final three steps of our model-making process.